When Life Gives You Lemons, MAKE ART!
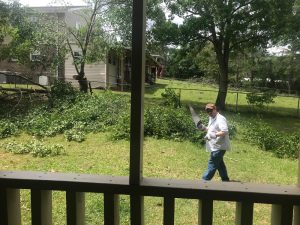
We’ve had a lot of severe weather in Southeast Alabama over the last few weeks. In the latest round of storms, my neighborhood took a big hit. While we were very lucky, we did still have a big tree come down in our backyard. It sounded like a bus being dropped when it hit. Severe weather at night is especially terrifying!
 As my husband cut the fallen beauty into more manageable pieces to move, I started to pick up the smaller bits of debris. I was struck by how alive and vibrant these leaves still looked, almost as if they were so shocked by the experience that they were frozen in time. Seeing big beautiful trees perish before their time always fills me with sadness and a desire to preserve a record of their existence. Then, inspiration struck! I had the pleasure of “attending” a virtual conference recently and one of the sessions presented an easy frottage project. Frottage is the technique of creating a design by rubbing (as with a pencil) over an object placed underneath the paper. This type of frottage is simply called leaf rubbing.

I gathered some interesting leaves and experimented to determine what leaves left the best impression. I LOVE magnolia leaves, but they were far too rigid to work well. I am not an arborist, so I have no idea what type of tree I ended up preferring, but they were pliable and thin and had enough veining to create some interesting details on the rubbings. I worked outside since our power was out from the storm. My “coworker” was happy to sit with me. It was a beautiful, though breezy, day, so to secure my papers, I just used a clipboard. In the conference session, our speaker used pencils, pastels, and crayons to create, but she found that crayons worked best, so that’s what I went with. I was very pleased with the results! It was a nice relaxing way to deal with an otherwise stressful situation. I hope you find this activity as enjoyable as I did!
How to Make a Leaf Rubbing
Materials needed:
Paper (I used copy paper, but any thin paper will do)
Crayons (peel the paper label off the crayons)
Leaves, flowers, plants (try to find those that are already on the ground)
Hard surface to work on
Painters or masking tape, binder clips, or clipboard to secure your paper
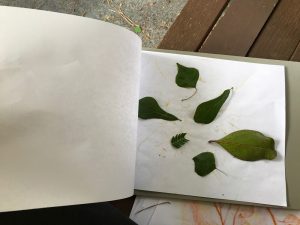
Step One: Gather leaves! Look for interesting shapes and details. Make sure they are thin and not too stiff.
Step Two: Arrange the leaves on a piece of paper (on your hard surface or clipboard). Think about balance and create interesting patterns.
Step Three: Place another sheet of paper over your leaves and secure it in place, either with masking tape, binder clips or the clipboard.
Step Four: Rub the crayon on its side over the top piece of paper, concentrating on the areas with leaves. You may need to rub in different directions to capture all the details of the leaves.
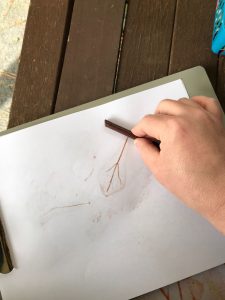
Step Five: (Optional) Go in with different colors to create interesting shading and dimensions!
Step Six: Enjoy what you’ve created…and make another!
[envira-gallery id=”9670″]
Easy, right? Make sure you save your leaves from this project as you might find a use for them with our Free For All Friday Challenge this week on Facebook. If you’re not following us on social media, you’re missing out!