Put a label on it!
 After weeks of fun, at home art activities, you likely have enough work to start your own gallery! Why not do just that? An important component of any museum or gallery is the label. Labels help visitors view and appreciate the artworks on display. This is a great way to encourage your students to talk about their artwork and identify their medium, message, and motivation!
Before you create your labels, discuss the artwork. This will help you create content for the brief description. Ask your student(s) to answer the following questions about their work. (For a fun twist, have students write about each other’s work rather than their own.)
- Look at your art and describe what you see.
- Describe how the art was made. What medium or materials were used to create it?
- Describe the art: How does it look? How big/small is it?
- What does this artwork tell us about the person who made it?
- How does this artwork make you feel?
- What do you know about the artist? (If it’s you, that’s an easy question to answer!) Why or how was this work created?
- What is the title of the piece? What does the title make you think of? Is it appropriate for the work? (Does it fit the artwork?)
If you are answering those questions for other artists’ work, you can discuss your answers with them and determine if there is anything else they might want “the public” to know about their work.
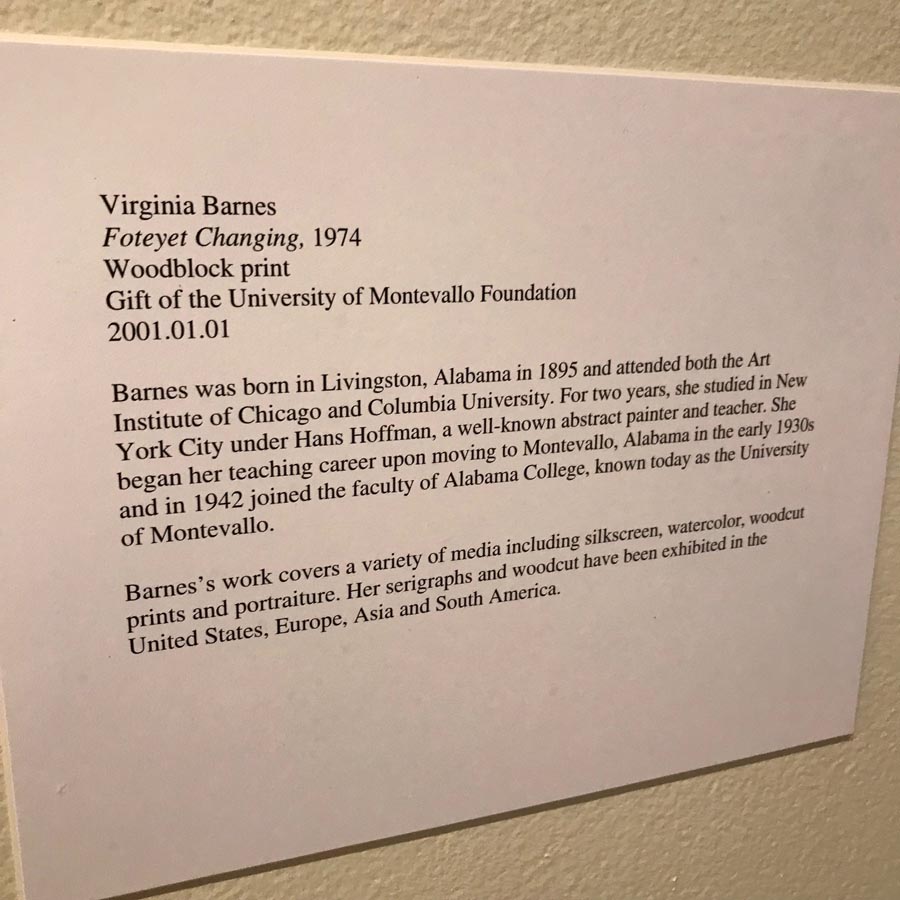
A good label gives accurate information about the artwork (title, artist, date created, medium) but can also tell us a little bit about the artist and their process and or/ motivation to create. That additional information helps us understand, appreciate, and enjoy the work even more. Now, let’s make a label!
How to Create a Label
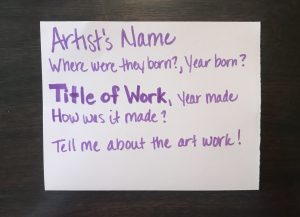
Your label should include:
- Artist’s name
- Nationality, birth year (Optional. You can also list birth year after the artist’s name.)
- Title of the artwork (in bold or italic), year created
- Medium used to create (ex: crayon on paper)
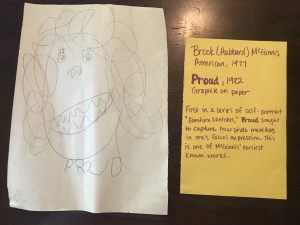
- Brief description (This is where you can include any information about the artist, why they created the piece, how they created the piece, etc.)
You can type this out on a computer or hand write it.
Your labels can be serious, silly, or even fake. Your gallery. Your rules! You can also glue them to cardboard or cardstock to make them a little sturdier. Then hang them next to the artwork!
Want to take this project further? Ask your student to pretend to be a museum docent and give a guided tour of your new gallery. Or you could record a gallery talk, in which your artist explains the process of how they created their masterpiece and why!
Thanks for visiting this resource! Wiregrass Museum of Art has been given a matching grant challenge in Spring 2023 — learn more and consider making a contribution to advance the museum’s work here!