What a Relief!
In an ongoing effort to share ways to create with everyday household materials, we present our latest art from home challenge: relief foil sculptures! What’s a relief? Wikipedia actually provides a great definition: “Relief is a sculptural technique where the sculpted elements remain attached to a solid background of the same material. The term relief is from the Latin verb relevo, to raise. To create a sculpture in relief is to give the impression that the sculpted material has been raised above the background plane.” Sounds fancy, right?
I made samples with two different techniques and the experiences were very different. Regardless of which method you choose to experiment with, this project provides a great platform to talk about the different types of sculpture or to simply introduce the concept of texture, especially with the glue only method.
One thing to keep in mind—you must let the glue dry completely before you add the foil, so this isn’t a quick project. It could be made faster by skipping the glue outlining and just using the optional cardboard/foam shapes for your raised elements. Adapt the steps for what will work best for you and your little artists!
How to Create a Relief Foil Sculpture
Materials needed:
- Aluminum foil
- School glue (in a bottle, not glue sticks)
- Cardboard or cardstock (for the base)
- Sharpies
- Optional: Additional cardboard, felt, or craft foam to cut for shapes
Steps:
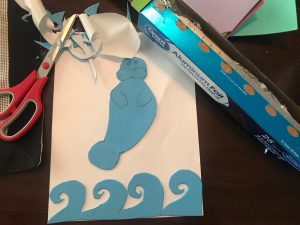
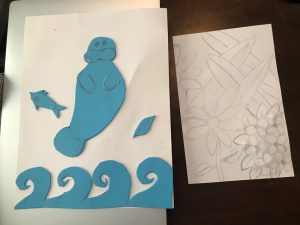
- Draw your design. This can be done with pencil. You can also draw shapes or pieces of your design on cardboard, felt, or craft foam for added dimension. If you choose to do this, cut them out and glue them on to the background before you move on to Step 2.
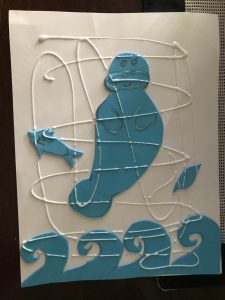
- Go over your pencil marks with glue. Make sure your glue is a thick, even line. If you included cut pieces for added dimension, you can also create additional detail/texture with the glue.
- Let the glue dry completely. This will take some time. Elmer’s dries clear so if you can’t see the glue any more it’s dry!
- Once dry, cover the entire piece with a thin layer of glue. You can use a wide paintbrush or a foam brush to spread it out and ensure that the glue is even.
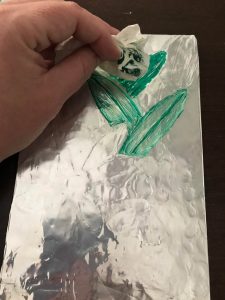
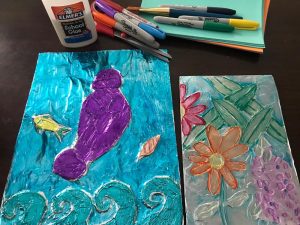
- Lay your aluminum foil down. I used a different type of foil for each project. Start in the center of your artwork and smooth out the foil as you go. You can use the back end of a spoon or your fingers. Be careful not to rip or tear your aluminum. Then fold the extra foil around the back of your artwork. You can glue it down in the back if you wish. I did not and it held fine. For my manatee with the foam pieces, I used the thin regular foil and heavy duty for the glue only flowers. While it worked, I think I would switch this for future projects. The thinner foil would show more detail of the glue only relief, while the heavy-duty foil would make it easier to define the foam shapes without tearing the foil. Learn from my mistakes!

- Time to color! For my manatee, I just colored as normal, using a darker color to emphasize the outline of my shapes and details. For the flowers, I colored first and then wiped off the excess with a napkin, then I went back and outlined the raised details. This creates a cool shading effect. However, if you want to try this, work in small areas as the sharpie dries quickly. If this happens, you can go back over it and then wipe away. The new color picks up the old.
And you are done! Aluminum Foil Reliefs take time and a little finesse, but this very tactile project is sure to be a hit with your little artists!
Are you following us on social media? If not, you should be! Share your work with us on Facebook or Instagram. We LOVE to see your creations!